How to make acrylic charms without dying
Acrylic charms are an adorable, convenient way of personalizing belongings, and they’re popular sells at conventions! If you’re an artist who’s ever wondered how to make your own acrylic charms, then here’s a thorough tutorial on how to do so… without perishing.
1. Creating the art
First things first: you’ll have to make your art! The following tips are for making your art with charms in mind.
SIZE
It’s good practice to draw your art at least 2x the size you plan it for, at 300 DPI. For one, you can always resize your art down, but it’s a pain to size up without pixelation or loss of quality. For two, big art allows you to cross over into other products, like having the same design on vinyl stickers.
Personally, I like to draw my art at a minimum of 5” at 300 DPI.
COMPOSITION
Art composition is an underrated aspect of charm-making. The aesthetics of the acrylic cutline actually make a huge difference in the charm.
Here’s one of the very first charms I made:
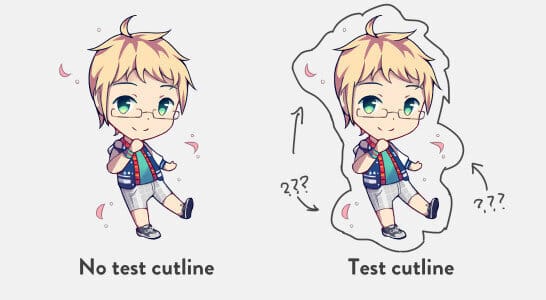
As you can see, the art looked fine on my canvas, but when tested with a cutline, there were some super weird parts that jutted out. The overall shape and silhouette is just not very pleasing to the eye.
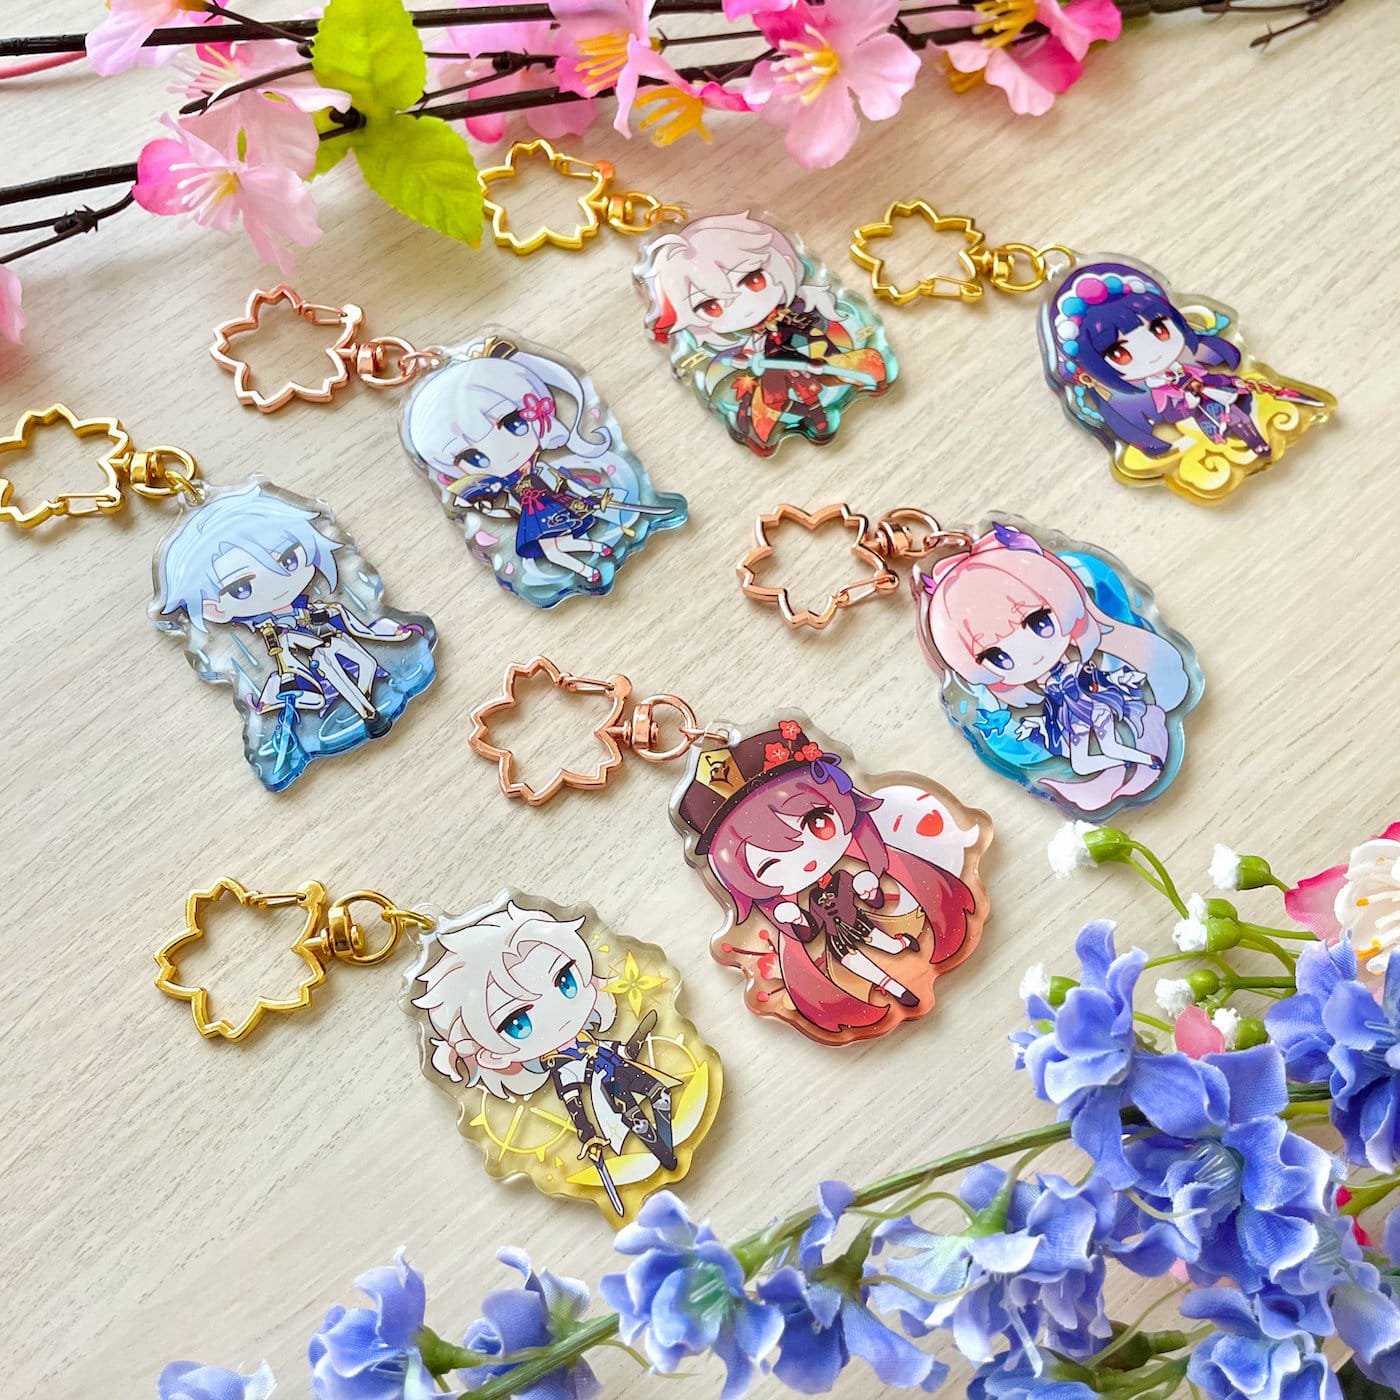
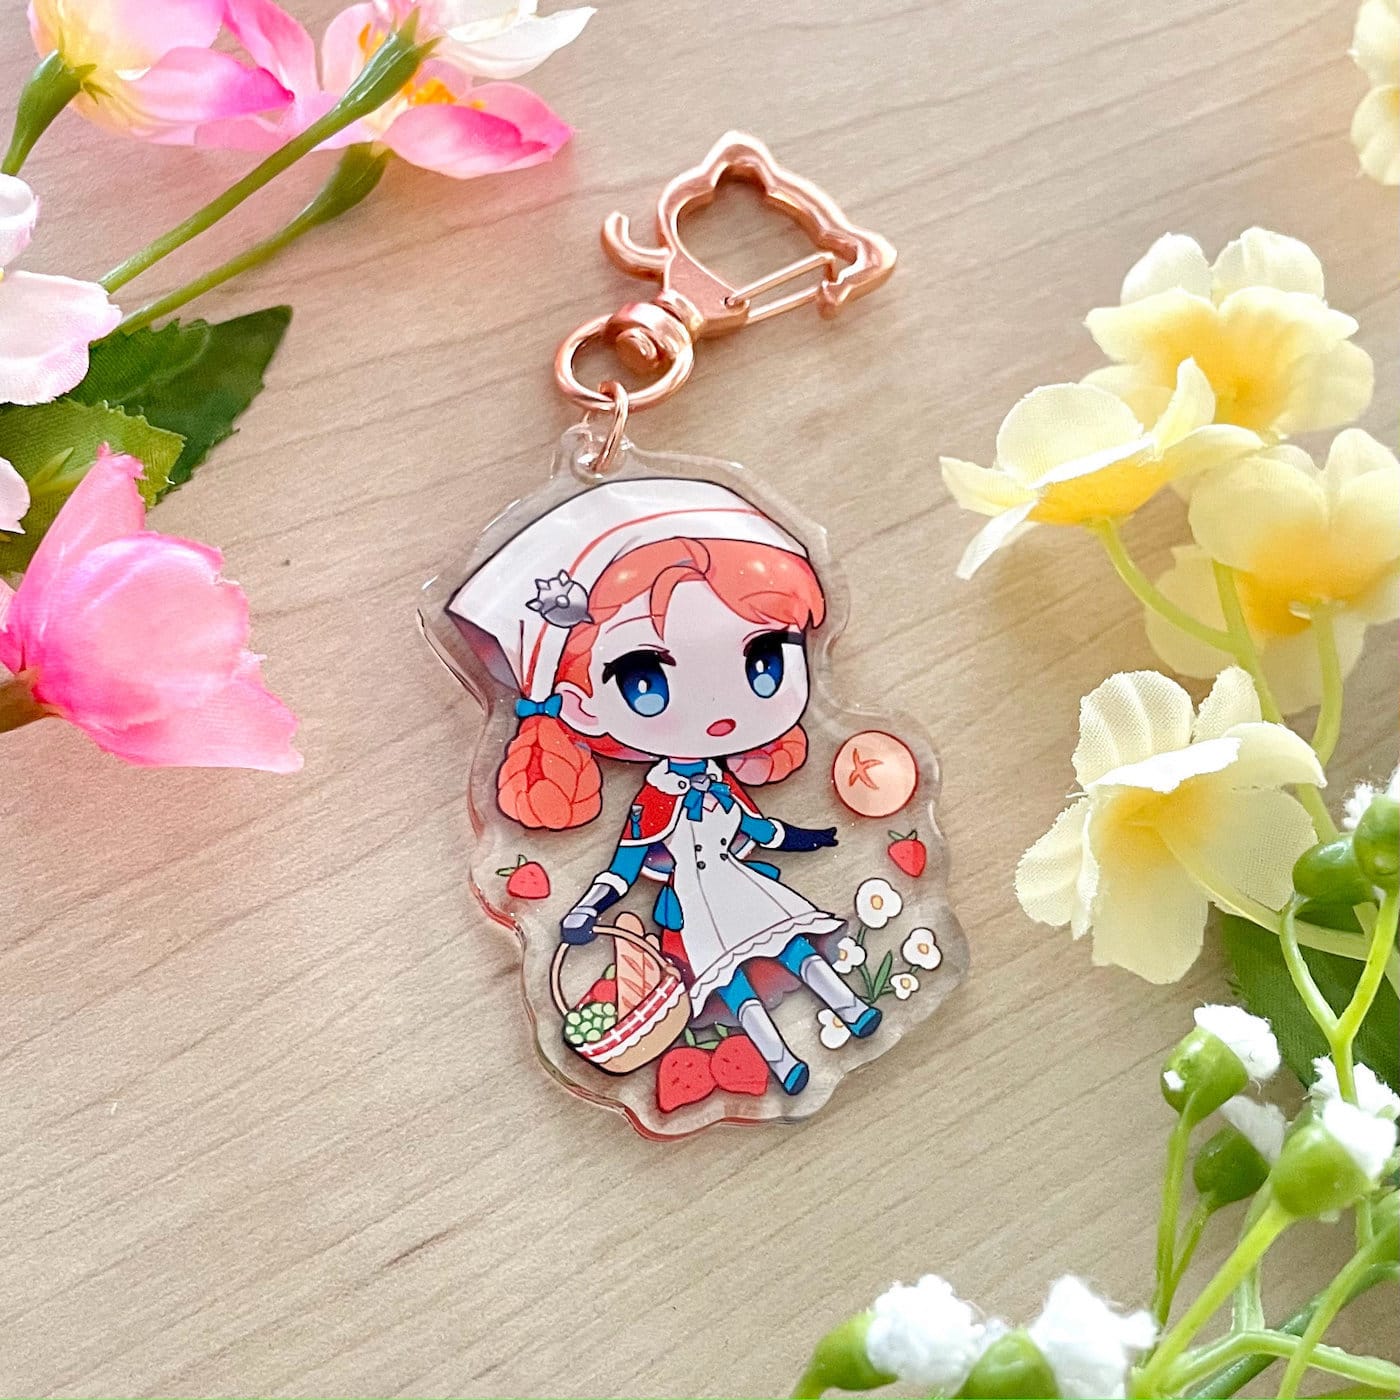
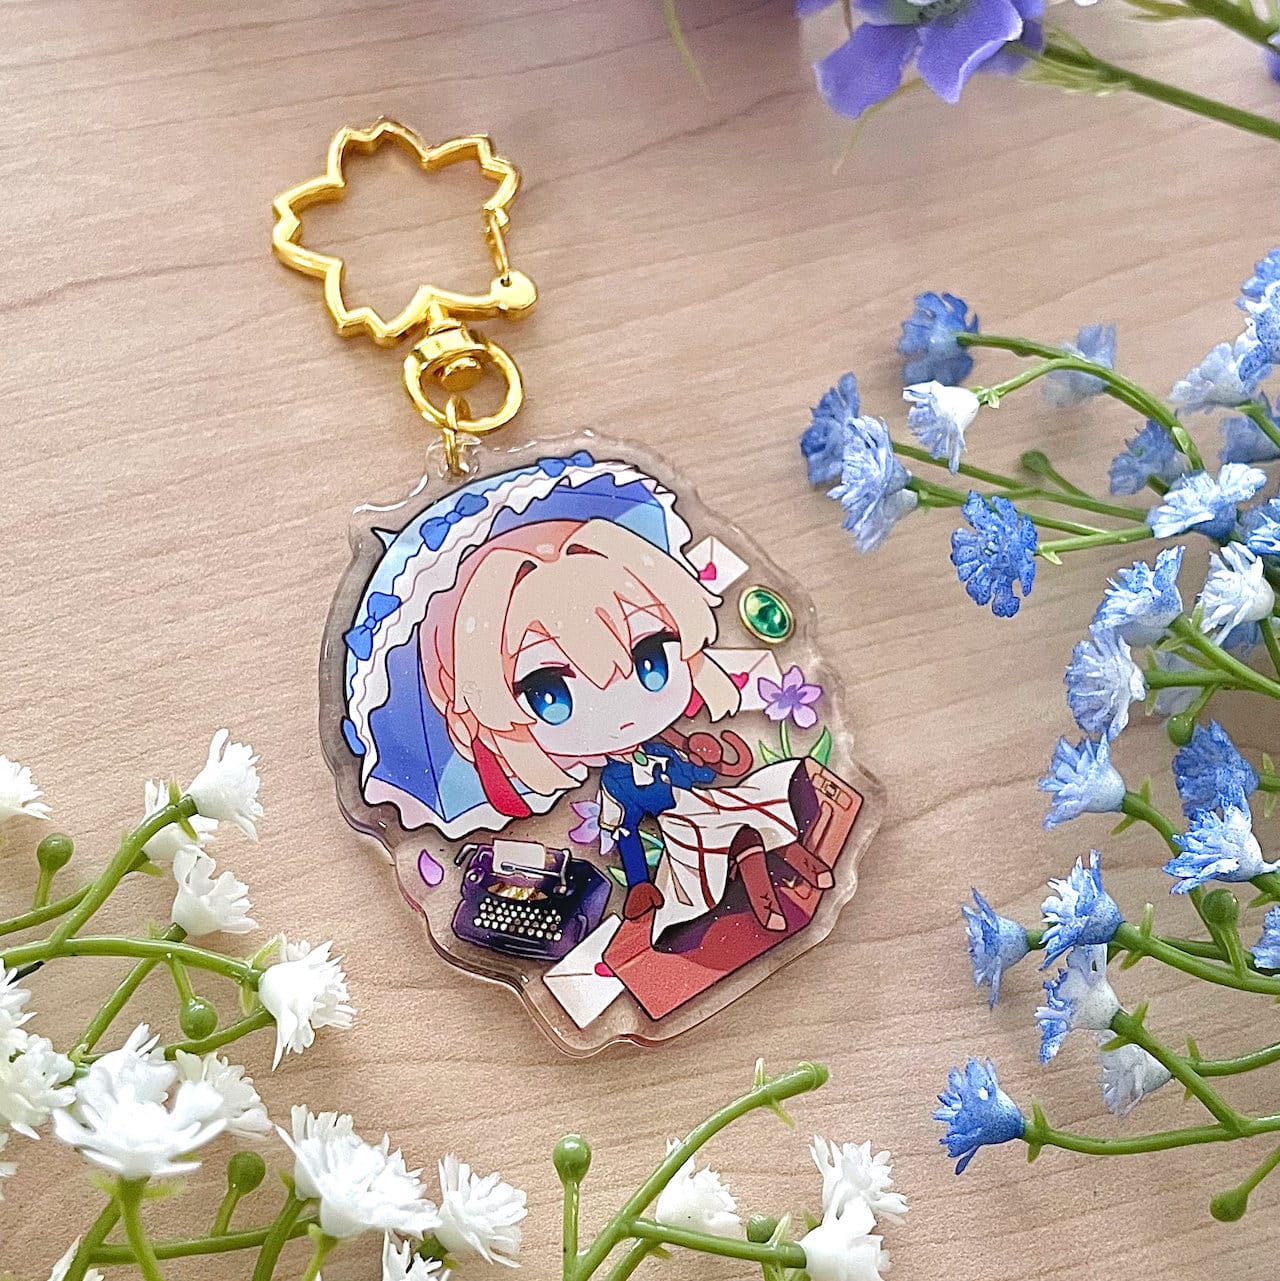
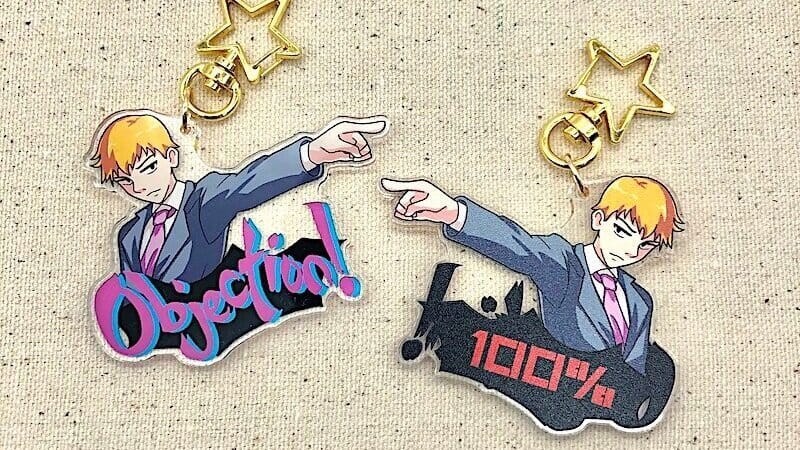
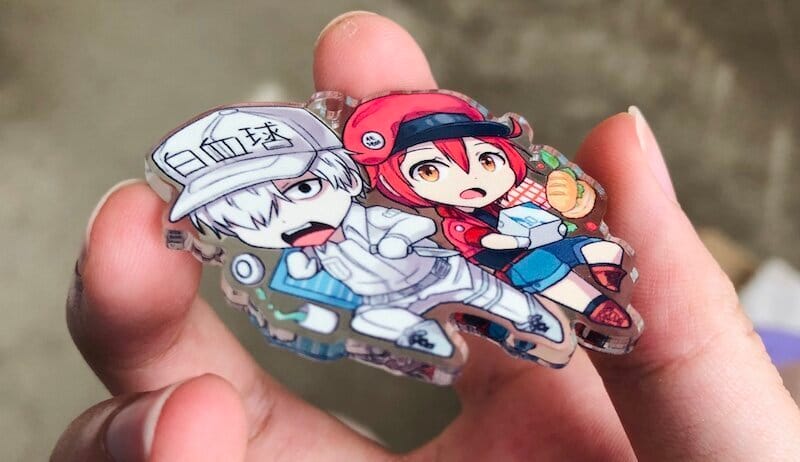
In comparison, here’s some charms I made after some more experience:
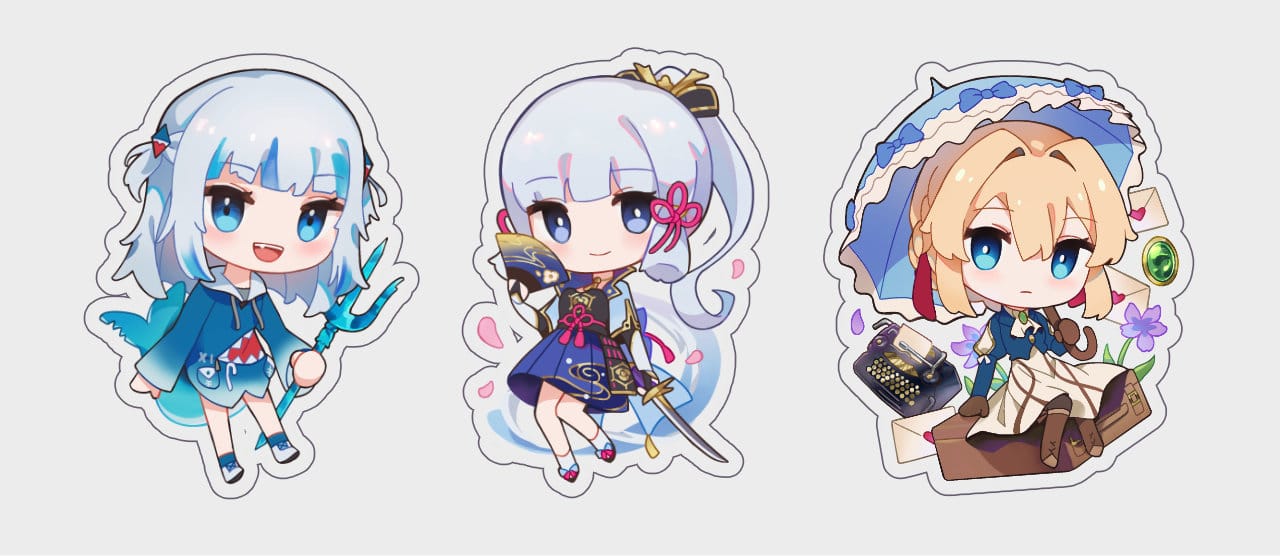
The cutlines feel more solid and cohesive, and there’s a very obvious point of visual interest. Even if there are small objects, they’re arranged to flow with the overall composition of the charm. Once cut out, they feel great in travel size!
COLOR SELECTION
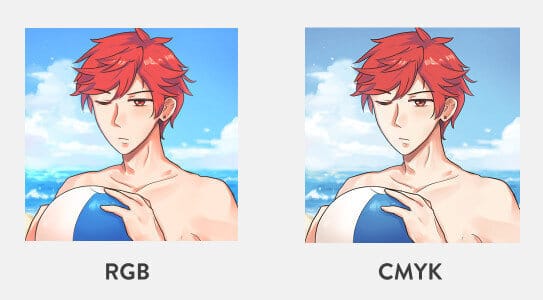
When drawing for charms, remember that your charms will be printed, meaning they have to be in CMYK color mode. In other words, blue is eaten for breakfast.
I use Clip Studio Paint, which only uses RGB, not CMYK. However, you’ll want to avoid any highly saturated blues, hot pinks, or neons while coloring, because those will usually be dulled when converting to CMYK.
2. Prepping the Files
Is your art ready? Time to format your files for your manufacturer!
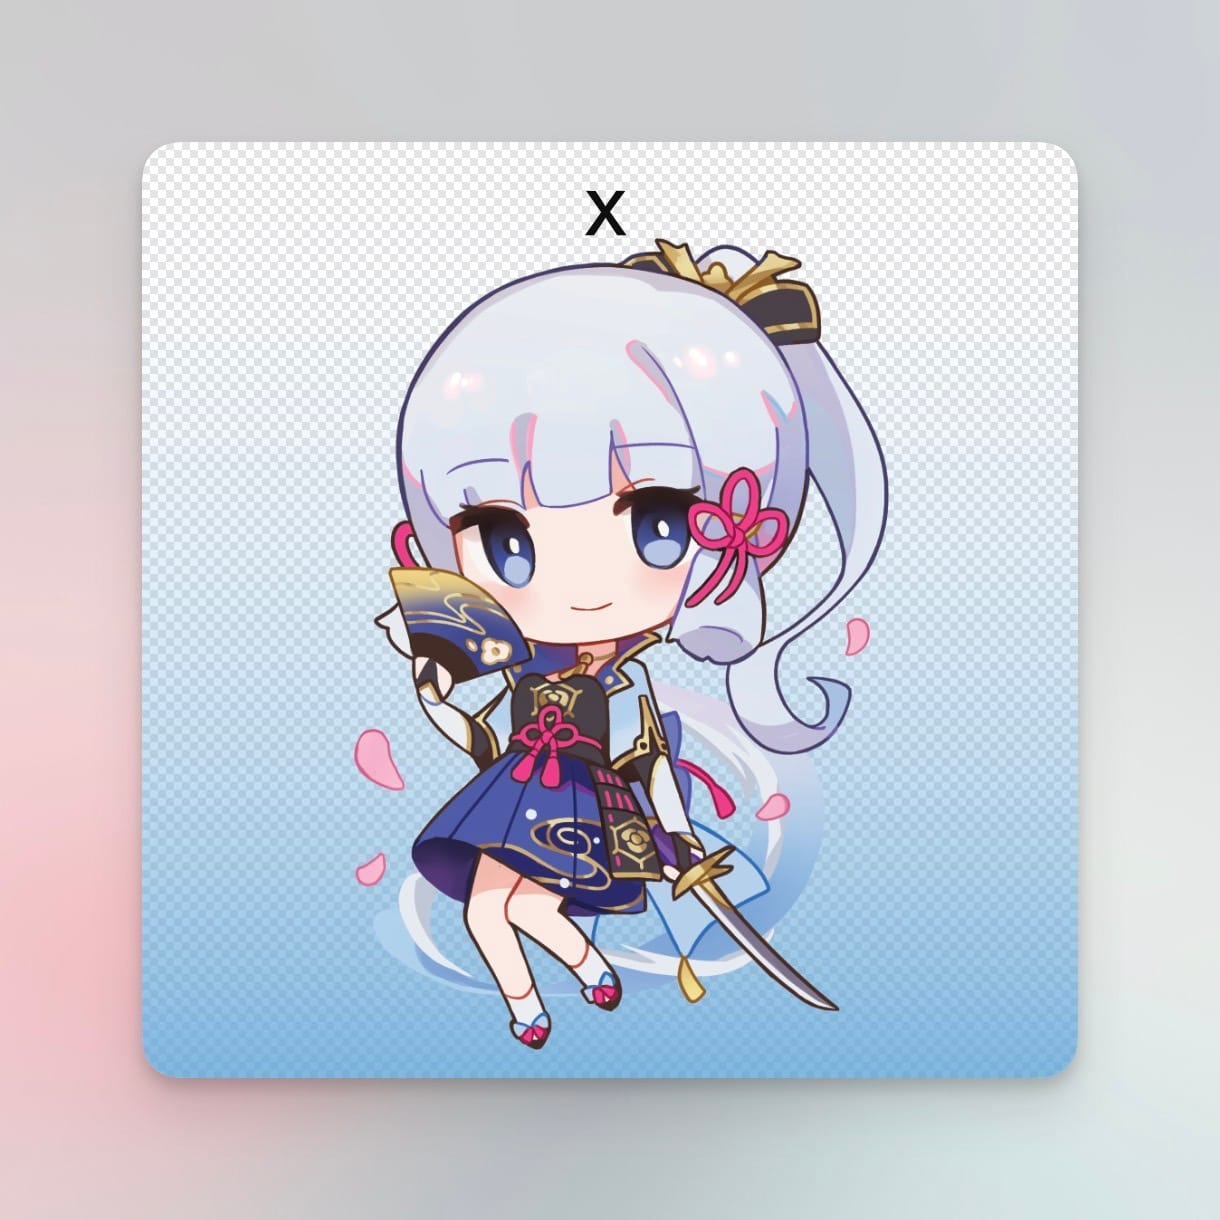
- Add an x where you'd like the manu to add the charm hole.
- If you'd like to have a gradient effect or transparent printing on your acrylic (see below), then add a layer beneath your charm art. Add any gradients or transparent printing to that layer.
FILE TYPES
JPG? PNG? TIFF? There’s a lot of image types out there, and they can make your head swim. Here’s a quick breakdown of them so you know what to use for your acrylic charms!
Want the tl;dr? Export your file as a CMYK PSD, max quality.
- JPG. JPG is an image format that can hold CMYK information, which is good for printers. However, it has some downsides; it can’t be transparent and it is lossy, meaning it always compresses some information and is not max-quality.
- PNG. PNG is an image format that is lossless, or max-quality, and also can be transparent. Unfortunately, it was developed specifically for computers, and can only be in RGB, not allowing CMYK.
- TIFF. TIFF is a relatively new image format that was made to solve all problems by creating a lossless, transparency-compatible, CMYK-compatible format. It’s generally the best option for printed work even though few people have heard of it. Manus may be unfamiliar with this format.
- PSD. PSDs, or Photoshop files, were once the standard of sending acrylic charm files because they are lossless, can hold multiple layers, CMYK information, and transparency information. But as we all know, Adobe went off their rocker and jacked up the price beyond what lowly artists could afford. Many programs like Clip Studio Paint have poor CMYK conversion, but thankfully, there are still some programs that have great CMYK PSD conversion, like Affinity Designer.
As a result, you’ll probably want to stick with CMYK TIFF or CMYK PSD to send to your manufacturer.
CMYK CONVERSION
Time to turn your images into CMYK so that they’re ready to print!
Do not export CMYK with Clip Studio Paint. I don’t know what they did to their algorithm, but something about the way CSP interprets CMYK color space destroys pieces faster than a rhino in a china shop. You’ll have to export as an RGB file (PNG), then do the CMYK conversion in another program.
I often sing the praises of the Affinity series, and I usually use Affinity Designer—a one time $50 cost, much cheaper than Photoshop. You can still export in layered PSDs, and their CMYK color space is much better than CSP.
(No, they don’t endorse me or anything. They’re just cool.)

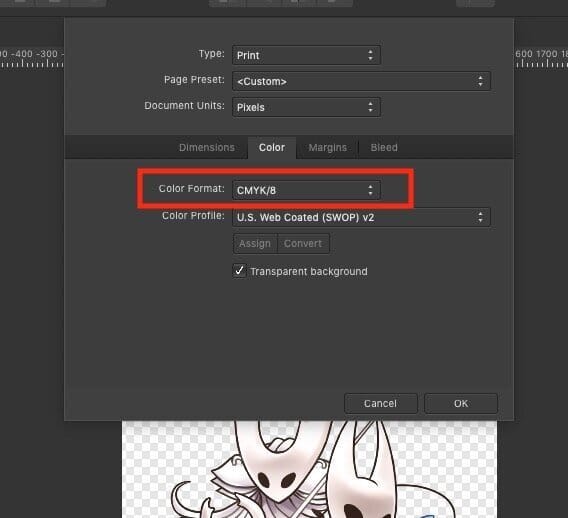
To change an image’s color space from RGB to CMYK in Affinity Designer, open up File > Document Setup…, find the Color tab, and select Color Format: CMYK/8. Hit OK, and your image will convert.
3. Picking a Manufacturer
Your art is ready, and now you just need a producer! There are two different kinds of manufacturers: domestic versus global.


DOMESTIC PRODUCERS
These domestic producers manufacture charms in-house with their own sets of printers, laser cutters, etc.
PROS
- Good communication
- Fast shipping
- Very few flawed items
CONS
- Expensive
- Limited customization
- Need to be assembled
- Setup time
With domestic producers, you trade time and money for personal connection. Domestic charms I’ve ordered are high quality with communicative staff, but they don’t come with accessories (like jump rings and keychain rings), and also require some setup time to use the companies’ special templates. If you aren’t comfortable working with jewelry, adding accessories can be time consuming and frustrating.
Below is a list of notable domestic producers at the time of this post’s writing, although you can find a more up-to-date version at my artist resources masterpost!
Notable domestic producers: Chilly Pig, Ink It Labs, Acorn Press, Zap Creatives for UK*
* Word on the street was that Zap Creatives was a middleman, but after looking into their blog, they state their charms are manufactured in-house.

ALIBABA PRODUCERS
Alibaba is a global trade marketplace where you can commission custom products directly from factories in other countries, mainly China.
PROS
- More affordable
- Tons of options
- Comes pre-assembled
- No setup time
CONS
- Expensive shipping
- Higher rate of shipping damage
- Larger risk of art theft
People may be reluctant to order from overseas like China or India due to rumors of art theft, but there are many manus who specify that they will never take or distribute your designs. Much of your experience will depend on which factory you choose, so do your research in this area. Rely on reviews and trusted recommendations when you make your selection. If picked properly, working with Alibaba manus can be a very smooth and easy process.
Alibaba manus often set up files and assemble charms with accessories for you. They also offer a lot more customization options like foil stamping, prism coating, epoxies, and more.
Since packages ship from overseas, you will find a slightly larger rate of flawed products in your order compared to domestic orders from shipping damage.
Below is a list of notable Alibaba producers at the time of this post’s writing, although you can find a more up-to-date version at my artist resources masterpost!
Notable Alibaba producers: Juno Charms, Kuien
4. Charm Options
There are a lot of options when it comes to the world of making charms, and it’s easy to get overwhelmed by them. Here’s a helpful little glossary/guide to what all those terms mean!
Note: Not every manu offers every option. This is just a guide for you to know what they mean when they refer to these terms.
SINGLE / DOUBLE BOARD
Single board charms are made of a single layer of acrylic with the design printed on the back, resulting in one side feeling like smooth acrylic and the other having a slightly textured feeling.
Double board charms are sandwiched by acrylic on both sides so that each side is equally smooth. They are only available with Alibaba producers.
GLOSS / MATTE FINISH
Some manus offer the option to add a coating or finish to the back side of your charms (single board only).
Matte usually feels a little textured, slightly scratchy in a linen-papery kind of way.
Gloss usually feels very smooth and shiny, similar to the acrylic side, but with a very slight bump where the art is.
EPOXY
Epoxy is a special thick coating applied onto a charm that protects the art. The result gives one (or both) sides of the charm a rounded edge, and the surface feels just like the acrylic. Sometimes specialty epoxies are available, like epoxies with glitter.
Epoxies adds significantly to the thickness and weight of the charm, which can either make it feel more substantial or overly heavy.
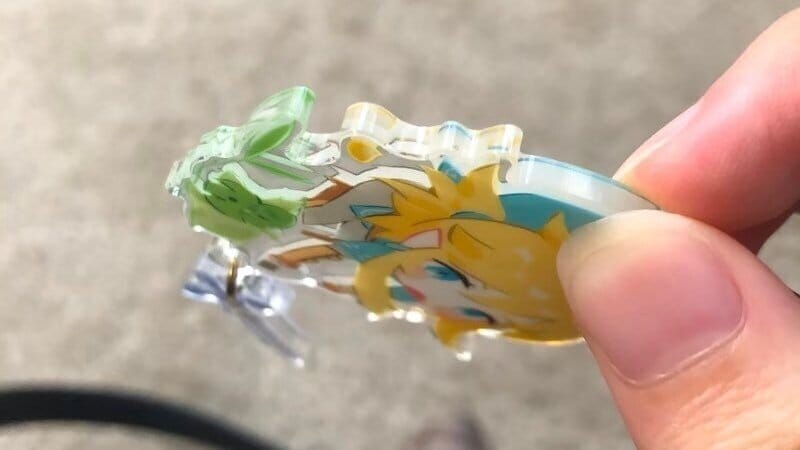
FOREGROUND / 3D PRINTING
Foreground printing is when the charm has multiple layers of acrylic with printed designs, giving some extra dimension to the artwork.
FOIL STAMPING
Foil stamping prints gold or silver foil on top of the acrylic once the charm is complete. This allows shiny foil patterns on top of the art.
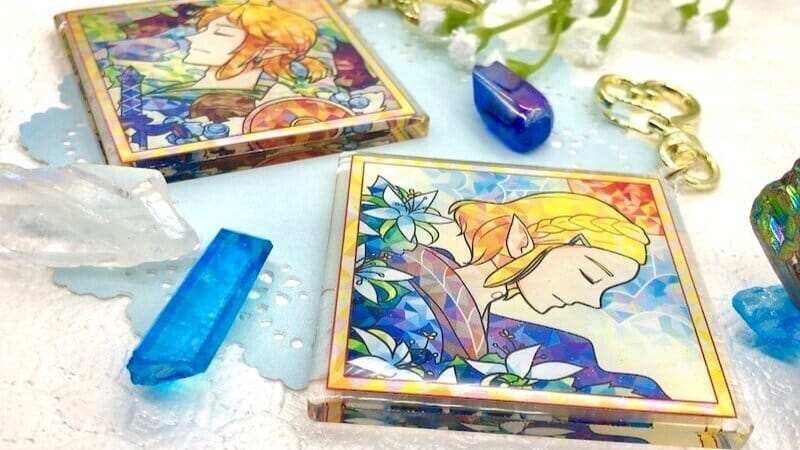
HOLOGRAPHIC / PRISM / BROKEN GLASS FINISH
Shard-like holographic film is applied to the acrylic charms, resulting in a special look like shiny/legendary cards, sort of like stained glass.
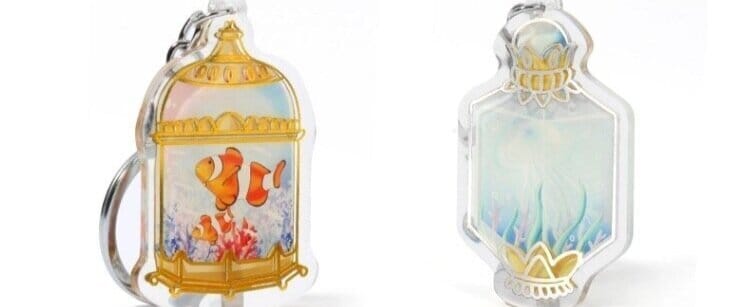
COLORED ACRYLIC
There's two possible methods to get a colored acrylic effect:
- Transparent printing allows you to add a semitransparent colored background (whether solid or gradient), which adds a very nice pop of candy-like color to your charm’s acrylic.
- Printing on tinted acrylic, also known as gumdrop charms, gives stronger pigmentation but has also makes the charms no longer see-through.
To prep your file for this effect, fill the background layer of your charm file with your desired color, at between 65% - 85% opacity (depending on how strong you want the background color to be). The background can also be a gradient or a pattern; it all depends on your tastes!

MIRROR ACRYLIC
Mirror acrylic gives a beautiful effect that catches and reflects the local light, giving a color-changing holographic effect to the charm. You can see the effect in action at this YouTube short.
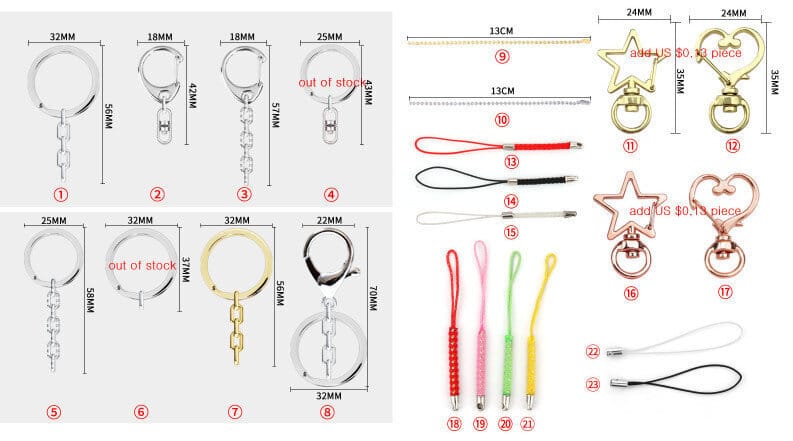
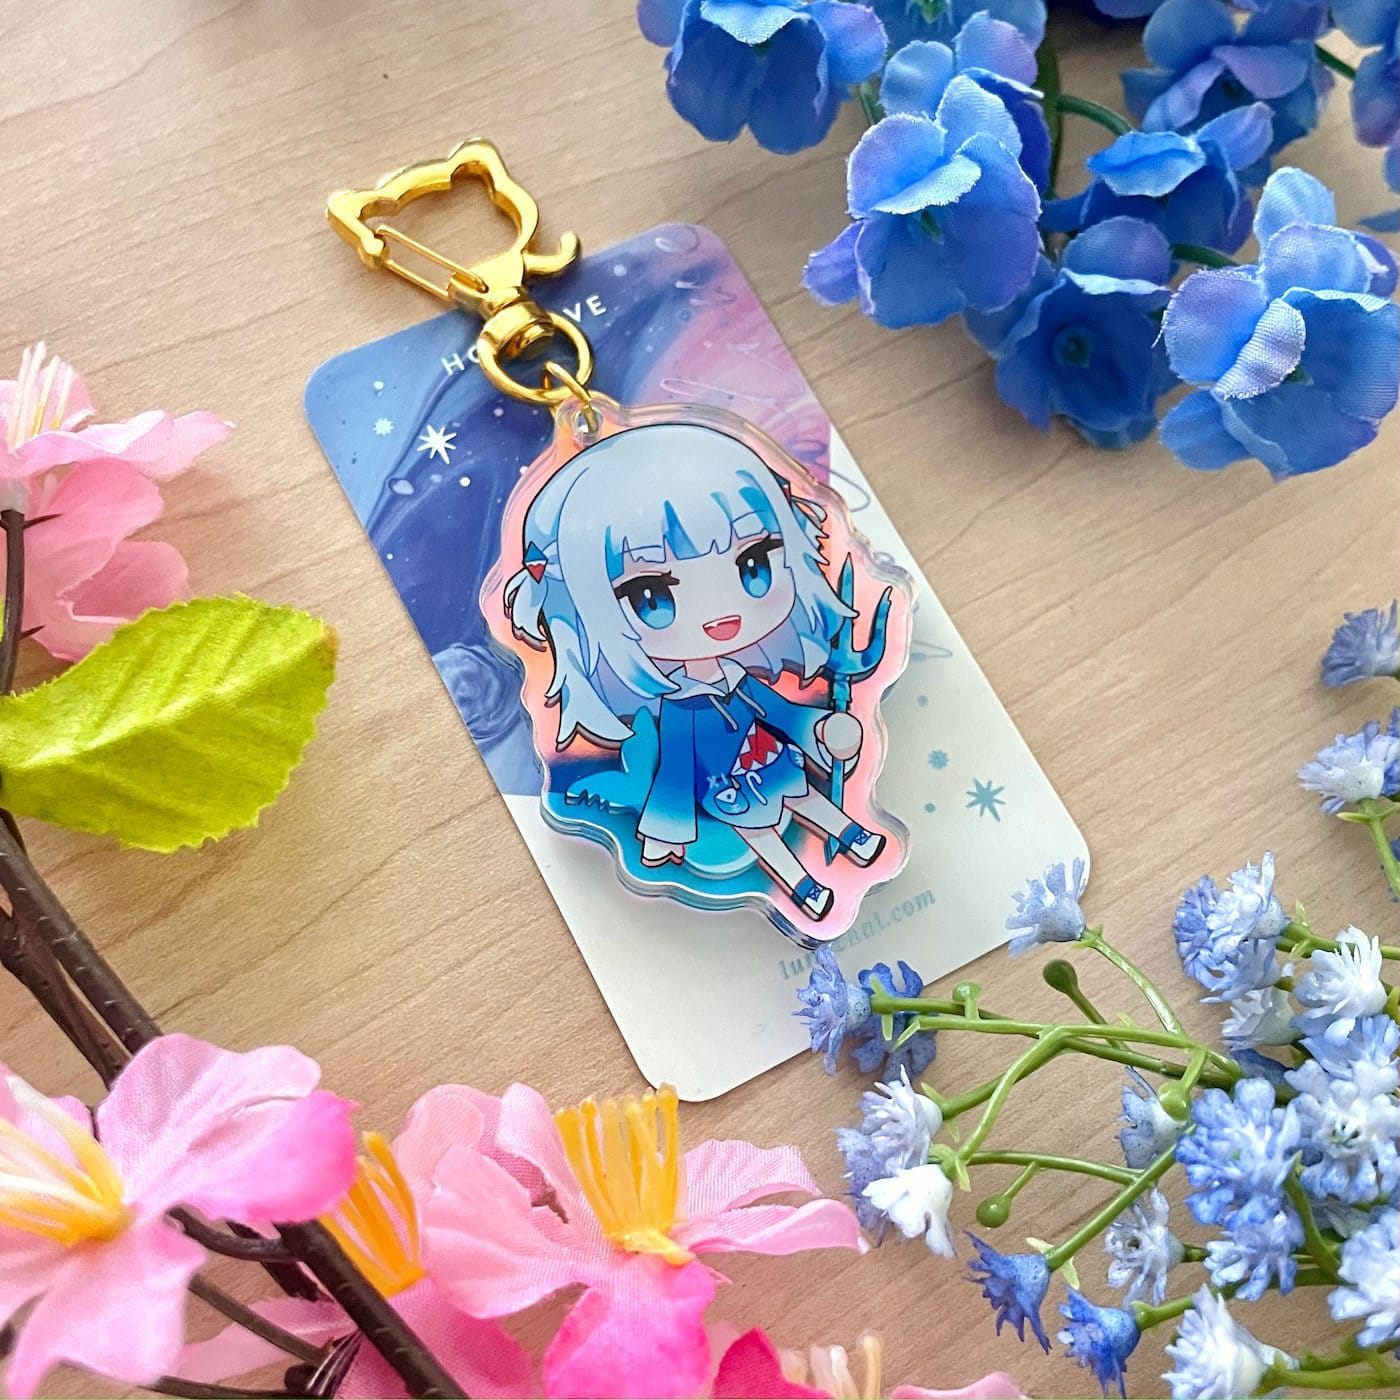
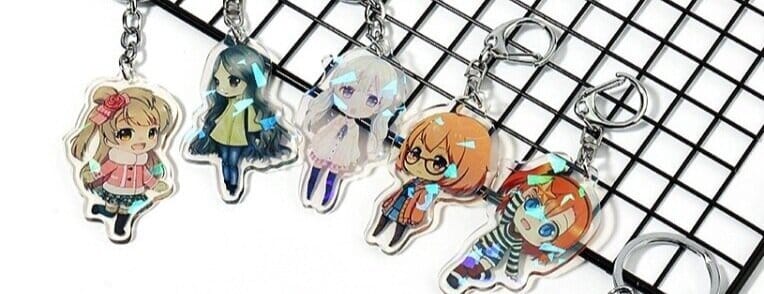
ACCESSORIES
Alibaba manus often assemble the charms for you, and have a wide variety of the attachment accessories to choose from. Above are some examples of accessories that they might offer. Generally speaking, special keychain rings are the most popular options.
POPULAR OPTIONS
Overwhelmed and not sure what to pick? Here's some of the more popular combinations from artists:
- Single board, single epoxy. A thicker charm with a plain or glitter epoxy adding additional substance and weight. Great for mini-charms, like 1” - 1.5” size.
- Double board, specialty coating. A pristine-feeling charm due to acrylic being on both sides, often featuring some kind of holo or sparkle effect. Great for larger charms, like 2.5” size or larger.
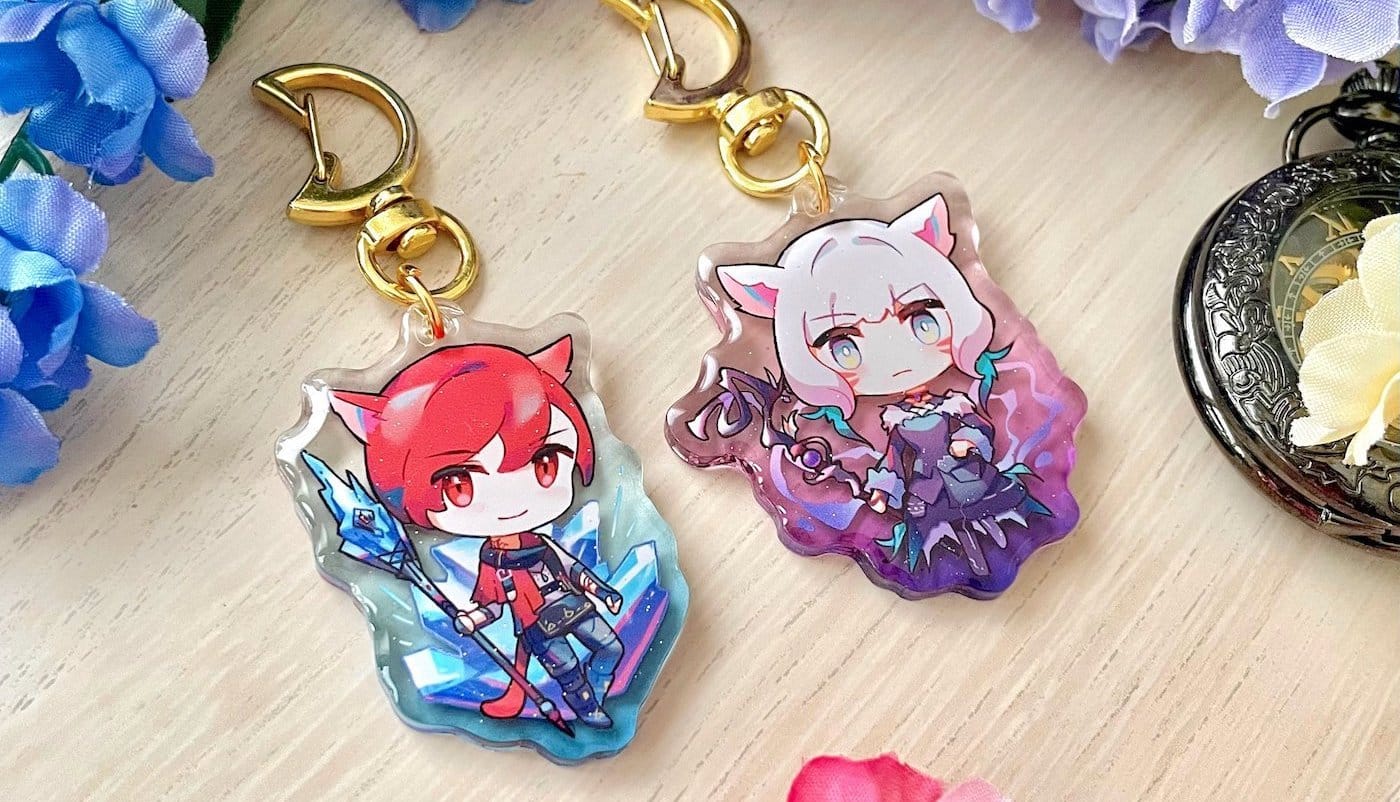
- Double board colored acrylic, single glitter epoxy. The trending “gradient charm” with a glitter finish on the front side to catch the eye.
5. Ordering Charms
Selected your options and ready to go? Time to contact the manufacturer!
First of all, go to the manufacturer’s listing page and click “Contact Supplier.” For ordering from Alibaba, you’ll have to make an Alibaba account.

Give the manu a detailed breakdown of what you want, including:
- Charm type. Single board? Double board? Foil? 2", 4", epoxy, transparent printing? List all your desired options here.
- Quantity. Generally, order 10% more than what you plan to sell. This is your safety margin in case you receive any damaged charms.
- Shipping address. Give your shipping address for a quote that includes production, fees, and shipping. It highly depends on the number of charms you purchase, but you should expect to pay anywhere from $80-$200 for shipping to USA.
- Phone number. Add your phone number with the international code (e.g. +1 234 567 8910). Manus will need to add this info onto the shipping label.
- File upload or link. If the price they give you is satisfactory, send them a link or upload to your image file. Make sure it’s in the right format—most take RGB PNG or CMYK PSD!
SENDING PAYMENT
Some manus will send a formal invoice via Alibaba, whereas others will request sending payment via Paypal, plus screenshot proof.
If a manu requests Paypal payment, make sure you trust them, as you are not protected. Alibaba invoices provide some minor protection for your orders and generally come with lower risk.
6. Packaging Charms
You’ve received the charms! Charms will tend to come with protective film on one or both sides to help protect them from shipping damage.
Most artists do not peel the film so that they are safer during shipping transit. However, I often find that the damaged film makes the charm look bad, so I peel it off when packaging it. It’s up to your personal preference.

Now for my favorite step: packaging charms! Or you might hate it. You can feel free to keep it simple, but for me, this is a step that can really add a ton of love.
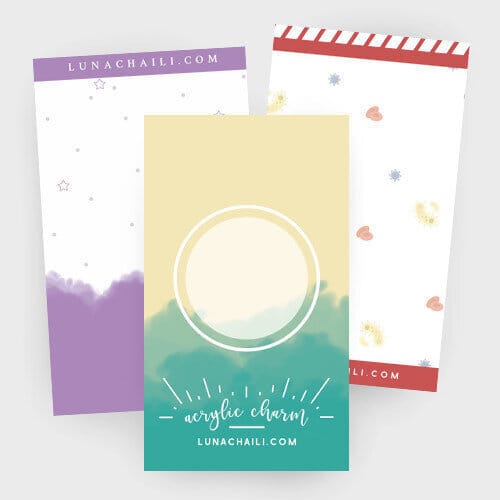
BACKING CARDS
Backing cards are the background-style cards behind your acrylic charms. They can help protect your charms from moving around and hitting each other in transit, and they can also serve as a very pretty aesthetic to help sell your customers on the purchase.
I like to simply design and order business cards, since business cards are fairly cheap and easy to print anywhere.
SLEEVES
For protective bags to house your charms and backing cards, check out Clear Bags! They offer plastic, kraft, and plant-based bags to hold your merchandise.
While you’re at it, please please please consider using their eco line, which uses plant-based material to create compostable crystal-clear bags.
And with that, your charms should be ready to sell!
DOMESTIC DIY’ERS: WORKING WITH JEWELRY
If you ordered your charms domestically, you’ll need to learn how to assemble them with jump rings and your accessory of choice, like keychains or phone straps. You’ll need the following!
- Jump rings, usually 7mm - 10mm
- Desired accessories such as black phone straps, heart keychain clasps, or star keychain clasps
- Two pairs of flat nose pliers
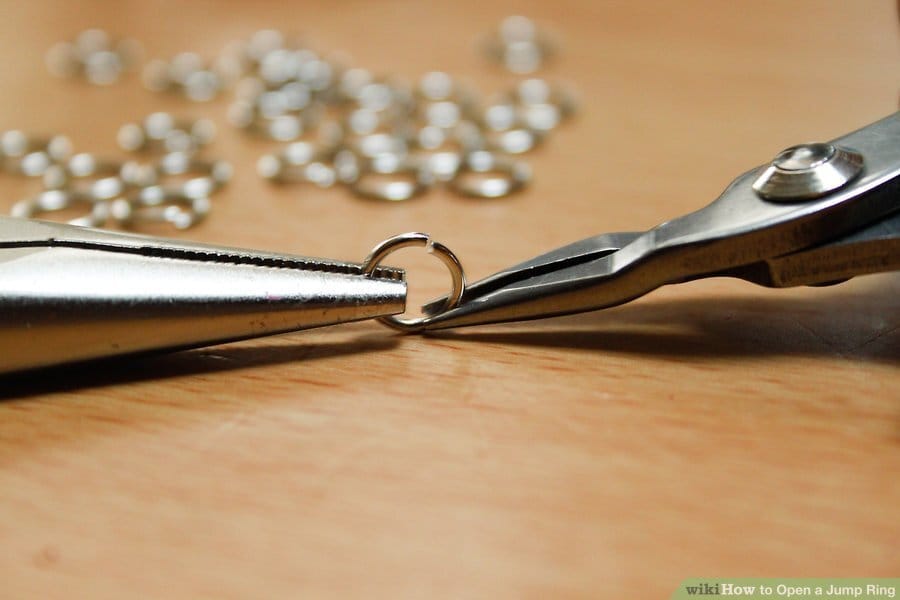
To assemble charms, you’ll need to do the following:
- Open a jump ring with the pliers. Be gentle with the handles or you’ll put dents into the jump ring.
- Thread the jump ring through the charm’s hole and your desired accessory.
- Close the jump ring with the pliers.
You Did It!
You’re at the end of the tutorial! Hopefully this post helped clarify any questions you might have about the charm-making process. Now go out there and have fun making your own charms!
Member discussion